前言
- 是不是被顶着二次元头像 Archer 嘲笑过还在用所谓 “破烂 Ubuntu ”?
- 是不是厌烦了官方 Ubuntu 的臃肿?
- 是不是想自己构建出完全适合自己的 Ubuntu Togo ?
这篇文章将会教会你如何去自己手动构建一个最简单的 Ubuntu 环境,舒适的 Ubuntu Togo 环境体验!并且了解一些关于 Linux 的基础知识!😊
预备工作
- 一个能上网的电脑(默认操作系统为 Windows )
- 一块移动硬盘
- 手机(可选项,如果你直接准备物理机安装的话,笔者为了写博客就用了 Hyper-V 虚拟机。)
准备软件
- Ventoy
- Diskgenius
(分区小天才,bushi) - Arch Linux Live ISO
安装 Ventoy 到移动硬盘上
首先进入 Ventoy 的 Github 发布页下载 Windows 版安装包: Releases · ventoy/Ventoy (github.com)
(如果访问 Github 慢的话可以用 kkgithub 加速,或者使用 瓦特工具箱 进行加速。下载文件慢可以用GitHub 文件加速 – Moeyy )
请确认你的移动硬盘已经与您的计算机连接好了,之后的操作将会格式化全盘,请注意备份。
下载好 Ventoy 的压缩包后,找个你喜欢的地方解压压缩包,然后打开其中的 “Ventoy2Disk.exe” 。为了方便你进行接下来的操作,请你先明白以下这些计算机基础概念,知道的可以跳过。(科普教程向:什么是硬盘分区?;一文读懂Legacy 和 UEFI的区别;新一代多系统启动U盘 Ventoy 使用指南;DiskGenius 硬盘分区教程。只需要明白基础就行,不必全部明白。)
打开后 Ventoy 的画面:
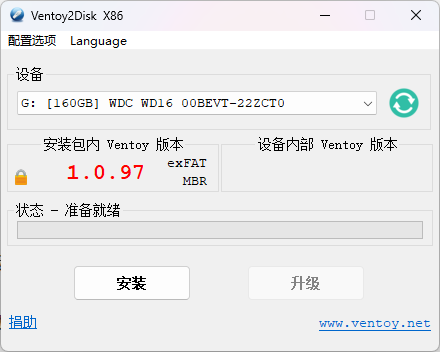
首先我们需要在分区后部预留出安装 Ubuntu 的空间,点击“配置选项”→“分区设置”。

勾选上“在磁盘最后保留一段空间”,然后输入你想为你安装的 Ubuntu 分配的空间,建议分配空间不超过原硬盘的90%(剩下的10%还要用来装一些杂物。)
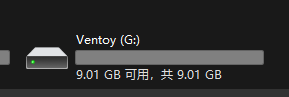
点击确定后开始安装,请确认你的数据已经备份妥善。安装完成后你会看到多出来的磁盘,名称为 Ventoy 。
这个时候就应该下载 Arch Linux Live ISO 了,选择 archlinux-x86_64.iso 开始下载。(下载地址:清华镜像源)
将下载好的 Arch Linux Live ISO 移动进 Ventoy 分区中,等待开始安装系统时使用。
分区操作
下载 Diskgenius ,然后将压缩包找个合适的地方解压。解压后运行 “DiskGenius.exe” 。

后面空闲的空间就是我们要安装 Ubuntu 的地方。我们先在这空白空间建立一个 Ext4分区 ,为以后安装 Ubuntu 图个方便。(懒得教怎么在命令行分区。)

系统安装
重启电脑启动你的移动硬盘进入 Ventoy 。(如果你不会那我也没辙了,每个电脑切换启动硬盘的键盘按键不一样。)或者启动虚拟机,将你的移动硬盘设置为虚拟机硬盘。
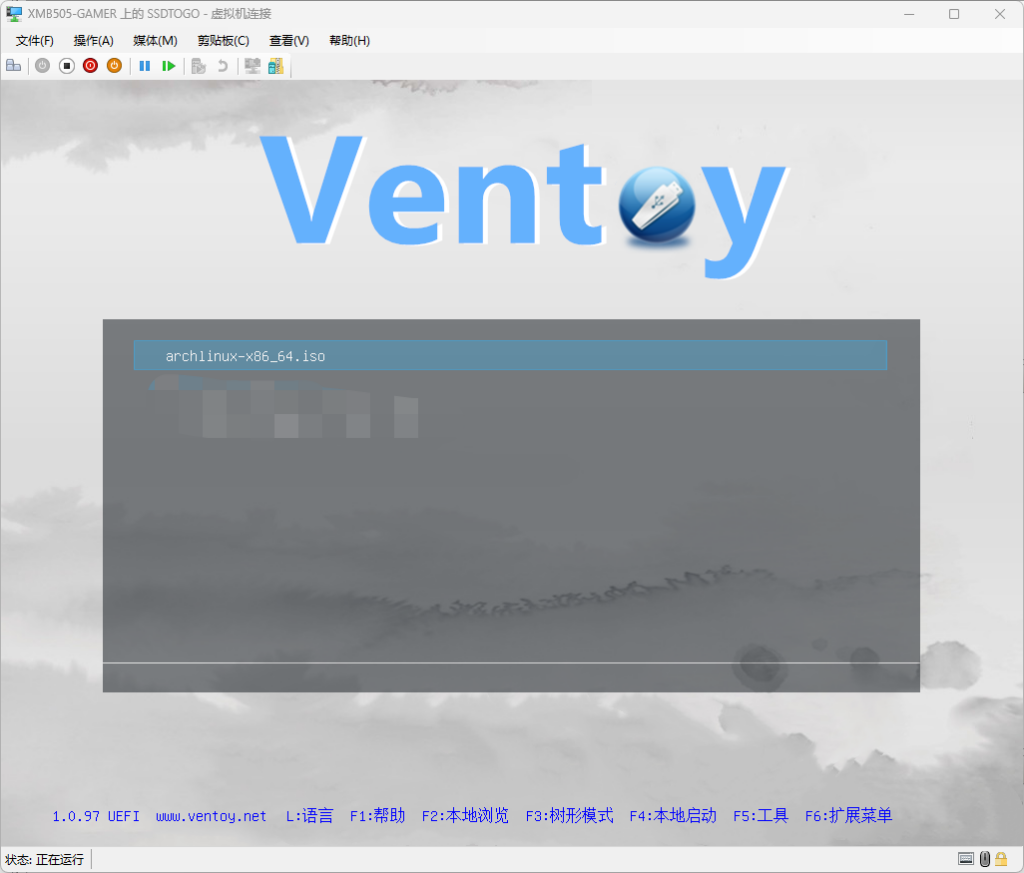
启动 Arch Linux Live ISO ,进入系统。
这里推荐通过 SSH 连接进入系统,免得手敲代码敲个错的。👉教程链接
启动后我们需要更新软件包缓存和软件包,执行以下命令来选择在中国最快的软件包镜像源。
reflector --verbose --country 'China' -l 200 -p https --sort rate --save /etc/pacman.d/mirrorlistroot@archiso ~ # reflector --verbose --country 'China' -l 200 -p https --sort rate --save /etc/pacman.d/mirrorlist
[2024-04-08 03:18:25] INFO: rating 6 mirror(s) by download speed
[2024-04-08 03:18:25] INFO: Server Rate Time
[2024-04-08 03:18:26] INFO: https://mirrors.neusoft.edu.cn/archlinux/ 9080.82 KiB/s 0.91 s
[2024-04-08 03:18:27] INFO: https://mirrors.ustc.edu.cn/archlinux/ 45095.08 KiB/s 0.18 s
[2024-04-08 03:18:28] INFO: https://mirrors.jlu.edu.cn/archlinux/ 10709.94 KiB/s 0.77 s
[2024-04-08 03:18:28] INFO: https://mirror.nyist.edu.cn/archlinux/ 29990.42 KiB/s 0.28 s
[2024-04-08 03:18:29] INFO: https://mirrors.shanghaitech.edu.cn/archlinux/ 25178.25 KiB/s 0.33 s
[2024-04-08 03:18:29] INFO: https://mirrors.jxust.edu.cn/archlinux/ 17800.25 KiB/s 0.47 s然后验证一次是否镜像源写入进 mirrorlist 。(可跳过)
cat /etc/pacman.d/mirrorlistroot@archiso ~ # cat /etc/pacman.d/mirrorlist
################################################################################
################# Arch Linux mirrorlist generated by Reflector #################
################################################################################
# With: reflector --verbose --country China -l 200 -p https --sort rate --save /etc/pacman.d/mirrorlist
# When: 2024-04-08 03:18:29 UTC
# From: https://archlinux.org/mirrors/status/json/
# Retrieved: 2024-04-08 03:18:25 UTC
# Last Check: 2024-04-08 03:12:07 UTC
Server = https://mirrors.ustc.edu.cn/archlinux/$repo/os/$arch
Server = https://mirror.nyist.edu.cn/archlinux/$repo/os/$arch
Server = https://mirrors.shanghaitech.edu.cn/archlinux/$repo/os/$arch
Server = https://mirrors.jxust.edu.cn/archlinux/$repo/os/$arch
Server = https://mirrors.jlu.edu.cn/archlinux/$repo/os/$arch
Server = https://mirrors.neusoft.edu.cn/archlinux/$repo/os/$arch更新软件包,但是不升级,命令运行完等待确认时回答 “n” 。
pacman -Syuuroot@archiso ~ # pacman -Syuu
:: Synchronizing package databases...
core 128.4 KiB 788 KiB/s 00:00 [##############################################################] 100% extra 8.1 MiB 47.6 MiB/s 00:00 [##############################################################] 100%:: Starting full system upgrade...
resolving dependencies...
looking for conflicting packages...
Packages (132) amd-ucode-20240312.3b128b60-1 archinstall-2.7.2-1 archlinux-keyring-20240313-1 audit-4.0.1-2 bcachefs-tools-3:1.6.4-2 bind-9.18.25-1 bluez-libs-5.73-4
brltty-6.6-6 broadcom-wl-6.30.223.271-540 btrfs-progs-6.8-2 bzip2-1.0.8-6 ca-certificates-mozilla-3.99-1 cloud-init-24.1-1 coreutils-9.5-1
cryptsetup-2.7.1-1 curl-8.7.1-5 device-mapper-2.03.23-3 ding-libs-0.6.2-2 e2fsprogs-1.47.0-2 efibootmgr-18-3 ell-0.64-2 expat-2.6.2-1
filesystem-2024.04.07-1 foot-terminfo-1.17.0-1 glib2-2.80.0-2 gnupg-2.4.5-1 gnutls-3.8.5-1 gpart-0.3-5 grub-2:2.12-2 hwdata-0.381-1 hyperv-6.7-2
iana-etc-20240222-1 icu-74.2-2 intel-ucode-20240312-1 iproute2-6.8.0-1 irssi-1.4.5-2 iwd-2.17-2 jansson-2.14-3 jfsutils-1.1.15-9
kitty-terminfo-0.33.1-3 kmod-32-1 libarchive-3.7.2-2 libassuan-2.5.7-2 libbsd-0.12.2-1 libcap-2.69-4 libdnet-1.18.0-1 libelf-0.191-1
libimobiledevice-1.3.0-11 libimobiledevice-glue-1.2.0-1 libinih-58-1 libldap-2.6.7-1 liblouis-3.29.0-1 libmnl-1.0.5-2 libmspack-1:1.11-1
libnetfilter_conntrack-1.0.9-2 libnewt-0.52.24-1 libnfnetlink-1.0.2-2 libnghttp2-1.61.0-1 libpipeline-1.5.7-2 libplist-2.4.0-1 libsodium-1.0.19-3
libsysprof-capture-46.0-1 libtiff-4.6.0-4 libunistring-1.2-1 libusbmuxd-2.1.0-1 libuv-1.48.0-2 libverto-0.3.2-5 libwbclient-4.20.0-2 libx11-1.8.9-1
libxcb-1.16.1-1 libxdmcp-1.1.5-1 libxml2-2.12.6-1 libxmu-1.2.0-1 linux-6.8.4.arch1-1 linux-firmware-20240312.3b128b60-1
linux-firmware-marvell-20240312.3b128b60-1 linux-firmware-whence-20240312.3b128b60-1 lvm2-2.03.23-3 lynx-2.9.0-2 lz4-1:1.9.4-3 man-db-2.12.1-1
man-pages-6.7-1 mc-4.8.31-3 mdadm-4.3-2 mkinitcpio-38.1-1 mkinitcpio-archiso-70-1 nbd-3.26.1-1 nilfs-utils-2.2.10-1 nss-3.99-1
open-vm-tools-6:12.4.0-1 openssh-9.7p1-1 openvpn-2.6.10-1 opus-1.5.1-1 pacman-6.1.0-3 pciutils-3.12.0-1 pcre2-10.43-3 pcsclite-2.0.3-1
pinentry-1.3.0-1 procps-ng-4.0.4-3 psmisc-23.7-1 python-3.11.8-1 python-babel-2.14.0-1 python-cryptography-42.0.5-1 python-docutils-1:0.20.1-2
python-markupsafe-2.1.5-1 python-pycparser-2.22-1 python-pyparted-3.13.0-3 qemu-guest-agent-8.2.2-2 refind-0.14.2-1 rpcbind-1.2.6-4 rsync-3.3.0-1
run-parts-5.17-1 screen-4.9.1-2 shadow-4.15.1-2 sof-firmware-2024.03-1 sqlite-3.45.2-1 systemd-255.4-2 systemd-libs-255.4-2 systemd-resolvconf-255.4-2
systemd-sysvcompat-255.4-2 talloc-2.4.2-1 tcl-8.6.14-3 tmux-3.4-5 tpm2-tools-5.6-1 udftools-2.3-2 util-linux-2.40-2 util-linux-libs-2.40-2
vim-9.1.0252-1 vim-runtime-9.1.0252-1 xorgproto-2024.1-2 xz-5.6.1-3 zsh-5.9-5
Total Download Size: 566.41 MiB
Total Installed Size: 1052.98 MiB
Net Upgrade Size: 32.08 MiB
:: Proceed with installation? [Y/n] n然后安装 “debootstrap” ,询问时回车确认。(debootstrap:Debian 系基础系统构建软件, Ubuntu 也属于 Debian 系发行版,可以使用此软件构件基础系统。)
pacman -S debootstrap1 root@archiso ~ # pacman -S debootstrap
resolving dependencies...
looking for conflicting packages...
Packages (2) wget-1.24.5-1 debootstrap-1.0.134-2
Total Download Size: 0.76 MiB
Total Installed Size: 3.43 MiB
:: Proceed with installation? [Y/n] y
:: Retrieving packages...
wget-1.24.5-1-x86_64 738.1 KiB 2.35 MiB/s 00:00 [##############################################################] 100% debootstrap-1.0.134-2-any 36.7 KiB 1222 KiB/s 00:00 [##############################################################] 100% Total (2/2) 774.7 KiB 2018 KiB/s 00:00 [##############################################################] 100%
(2/2) checking keys in keyring [##############################################################] 100%
(2/2) checking package integrity [##############################################################] 100%
(2/2) loading package files [##############################################################] 100%
(2/2) checking for file conflicts [##############################################################] 100%
(2/2) checking available disk space [##############################################################] 100%
:: Processing package changes...
(1/2) installing wget [##############################################################] 100%
Optional dependencies for wget
ca-certificates: HTTPS downloads [installed]
(2/2) installing debootstrap [##############################################################] 100%
Optional dependencies for debootstrap
gnupg: check release signatures [installed]
debian-archive-keyring: check release signatures for Debian
debian-ports-archive-keyring: check release signatures for Debian Ports
ubuntu-keyring: check release signatures for Ubuntu
:: Running post-transaction hooks...
(1/2) Arming ConditionNeedsUpdate...
(2/2) Updating the info directory file...初始化系统安装分区,先用 cfdisk 指令查看分区表(请注意,cfdisk 会默认打开 sda 硬盘,请注意辨识硬盘。)
cfdisk /dev/<想查看分区表的硬盘编号> Disk: /dev/sda
Size: 447.13 GiB, 480103981056 bytes, 937703088 sectors
Label: dos, identifier: 0x1941a3e0
Device Boot Start End Sectors Size Id Type
>> /dev/sda1 * 2048 14890671 14888624 7.1G 7 HPFS/NTFS/exFAT
/dev/sda2 14890672 14956207 65536 32M ef EFI (FAT-12/16/32)
/dev/sda3 14956544 937697279 922740736 440G 83 Linux
Free space 937697280 937703087 5808 2.8M
┌──────────────────────────────────────────────────────────────────────────────────────────────────────────────────────────────────────────────────────────────────────────┐
│ Partition type: HPFS/NTFS/exFAT (7) │
│ Attributes: 80 │
│ Filesystem UUID: 01C3AC6016A9B7FB │
│Filesystem LABEL: Ventoy │
│ Filesystem: ntfs │
└──────────────────────────────────────────────────────────────────────────────────────────────────────────────────────────────────────────────────────────────────────────┘
[Bootable] [ Delete ] [ Resize ] [ Quit ] [ Type ] [ Help ] [ Write ] [ Dump ]
Device is currently in use, repartitioning is probably a bad idea.
Quit program without writing changes可以看到 /dev/sda3 是我想要安装 Ubuntu 的地方。(其他人也许会有不同,注意情况。)选中底栏的 “Quit” 并回车退出此界面。
这个时候我们选择 ext4 文件系统 作为系统使用的文件系统,执行下面命令来初始化文件系统。(注意!还有很多文件系统可以选,什么 f2fs, btrfs 很多,看需求自己选,但是 ext4 最稳定)
mkfs.ext4 /dev/sda3如果遇到问题,直接同意就可以,其他的参数回车就行。
挂载安装分区到 /mnt 上。
mount /dev/sda3 /mnt这个时候安装分区已被挂载,可以开始安装 Ubuntu 。使用 debootstrap 安装 Ubuntu 2204 LTS ,调用清华镜像源。(代号 jammy,你也可以换成 noble 变成 2404 LTS )。
debootstrap jammy /mnt https://mirrors.tuna.tsinghua.edu.cn/ubuntu/安装好基本系统后我们需要进入到基本系统来进行后续配置
arch-chroot /mnt进入基本系统后,我们需要更新软件源和软件包,这里我们还是用清华源。
apt update
apt upgrade
apt install vim
vim /etc/apt/sources.list
删除文件内的文本并将下列文本输入进文件中(用来补全软件源软件包,千万别手打,容易打错)。
# 默认注释了源码镜像以提高 apt update 速度,如有需要可自行取消注释
deb https://mirrors.tuna.tsinghua.edu.cn/ubuntu/ jammy main restricted universe multiverse
# deb-src https://mirrors.tuna.tsinghua.edu.cn/ubuntu/ jammy main restricted universe multiverse
deb https://mirrors.tuna.tsinghua.edu.cn/ubuntu/ jammy-updates main restricted universe multiverse
# deb-src https://mirrors.tuna.tsinghua.edu.cn/ubuntu/ jammy-updates main restricted universe multiverse
deb https://mirrors.tuna.tsinghua.edu.cn/ubuntu/ jammy-backports main restricted universe multiverse
# deb-src https://mirrors.tuna.tsinghua.edu.cn/ubuntu/ jammy-backports main restricted universe multiverse

deb http://security.ubuntu.com/ubuntu/ jammy-security main restricted universe multiverse
# deb-src http://security.ubuntu.com/ubuntu/ jammy-security main restricted universe multiverse

# 预发布软件源,不建议启用
deb https://mirrors.tuna.tsinghua.edu.cn/ubuntu/ jammy-proposed main restricted universe multiverse
# # deb-src https://mirrors.tuna.tsinghua.edu.cn/ubuntu/ jammy-proposed main restricted universe multiverse
然后退出文本编辑器(在命令模式下输入 :wq),重新更新软件包。
apt update
apt upgrade
安装 fish 并运行来补全命令。
apt install fish
fish
进入 fish 后,更改系统的主机名,变成你想要的。
vim /etc/hostname更改主机名后,我们需要安装中文语言包并设置语言为中文。(不建议跳过此步,不然语言选项会默认 C.UTF-8 )执行以下命令( Tips:dpkg-reconfigure 必须要在 sudo 下在能运行,甭管你是不是 root 用户。):
apt install language-pack-zh-hans
sudo dpkg-reconfigure locales
┌─────────────────────────────────────────────────────────────────────┤ Configuring locales ├──────────────────────────────────────────────────────────────────────┐
│ Locales are a framework to switch between multiple languages and allow users to use their language, country, characters, collation order, etc. │
│ │
│ Please choose which locales to generate. UTF-8 locales should be chosen by default, particularly for new installations. Other character sets may be useful for │
│ backwards compatibility with older systems and software. │
│ │
│ Locales to be generated: │
│ │
│ [ ] All locales ↑ │
│ [ ] C.UTF-8 UTF-8 ▮ │
│ [ ] aa_DJ ISO-8859-1 ▒ │
│ [ ] aa_DJ.UTF-8 UTF-8 ▒ │
│ [ ] aa_ER UTF-8 ▒ │
│ [ ] aa_ER@saaho UTF-8 ▒ │
│ [ ] aa_ET UTF-8 ▒ │
│ [ ] af_ZA ISO-8859-1 ▒ │
│ [ ] af_ZA.UTF-8 UTF-8 ▒ │
│ [ ] agr_PE UTF-8 ▒ │
│ [ ] ak_GH UTF-8 ▒ │
│ [ ] am_ET UTF-8 ▒ │
│ [ ] an_ES ISO-8859-15 ▒ │
│ [ ] an_ES.UTF-8 UTF-8 ▒ │
│ [ ] anp_IN UTF-8 ▒ │
│ [ ] ar_AE ISO-8859-6 ▒ │
│ [ ] ar_AE.UTF-8 UTF-8 ▒ │
│ [ ] ar_BH ISO-8859-6 ▒ │
│ [ ] ar_BH.UTF-8 UTF-8 ▒ │
│ [ ] ar_DZ ISO-8859-6 ▒ │
│ [ ] ar_DZ.UTF-8 UTF-8 ▒ │
│ [ ] ar_EG ISO-8859-6 ▒ │
│ [ ] ar_EG.UTF-8 UTF-8 ▒ │
│ [ ] ar_IN UTF-8 ▒ │
│ [ ] ar_IQ ISO-8859-6 ▒ │
│ [ ] ar_IQ.UTF-8 UTF-8 ▒ │
│ [ ] ar_JO ISO-8859-6 ↓ │
│ │
│ │
│ <Ok> <Cancel> │
│ │
└──────────────────────────────────────────────────────────────────────────────────────────────────────────────────────────────────────────────────────────────────┘往下翻菜单,找到以下几项,用空格勾选。
- en_US.UTF-8 UTF-8
- zh_CN.UTF-8 UTF-8
回车后选择 zh_CN.UTF-8 ,然后继续回车。(如果有多个,选最上面那个。)
现在用 adduser 脚本来创建用户(这个命令也必须用到 sudo )。
sudo adduser <你想创建的用户名>然后系统会询问你一些关于新用户的问题,前面两个是设置密码和确认密码,其他的一直回车就行了。
root@archiso / [1]# sudo adduser xmb505
Adding user `xmb505' ...
Adding new group `xmb505' (1000) ...
Adding new user `xmb505' (1000) with group `xmb505' ...
Creating home directory `/home/xmb505' ...
Copying files from `/etc/skel' ...
New password:
Retype new password:
passwd: password updated successfully
Changing the user information for xmb505
Enter the new value, or press ENTER for the default
        Full Name []:
        Room Number []:
        Work Phone []:
        Home Phone []:
        Other []:
Is the information correct? [Y/n]
然后我们需要将用户移入 sudo 组,这样用户才能使用 root 权限。
sudo usermod -aG sudo <你刚创建的用户名>使用 su 命令切换到新创建的用户。
su <你刚创建的用户名>这个时候你就切换到了你创建的用户了,并且语言环境也变为中文了。接下来就是安装些基础软件包了。
- bash-completion ( bash tab 补全)
- linux-generic-hwe-22.04-edge (官方源 Linux 最新稳定内核和驱动程序包)
- ubuntu-standard (标准 Ubuntu 软件集)
- kde-standard (标准 KDE 软件集)
- kubuntu-desktop ( Kubuntu 桌面软件集)
- language-pack-kde-zh-hans ( KDE 简体中文软件包)
- aptitude (更强大的 deb 前端软件)
- network-manager (网络管理器)
- network-manager-config-connectivity-ubuntu (网络管理器在 Ubuntu 下的配置文件。)
- ifupdown (配置网络接口的高层次工具)
- net-tools (网络实用工具)
- bluez (蓝牙实用工具)
- build-essential (普通 C++ 编译环境)
- btrfs-progs ( Btrfs 支持)
- software-properties-common ( PPA 支持)
笔者建议先安装 “software-properties-common” 来启用 PPA ,然后添加 apt-fast 的 PPA 源。 apt-fast 可以利用多线程提升下载软件包时的速度。你顺便也可以添加 KDE 向后支持源,在 Ubuntu 2204 LTS 体验到 KDE 5.27 ,还有显卡 PPA 源,用上比官方版本更新的显卡驱动程序。( KDE 向后支持源里面的软件不稳定哦先说好)
sudo add-apt-repository ppa:apt-fast/stable
sudo add-apt-repository ppa:kubuntu-ppa/backports-extra
sudo add-apt-repository ppa:graphics-drivers/ppa
sudo add-apt-repository ppa:zhangsongcui3371/fastfetch
sudo apt install apt-fast
笔者建议这个时候卸载 snapd (个人建议,不想卸载的可以跳过此步骤。 snap 真难用,趁现在还没有挂载 snapd 赶紧趁他病要他命。)
sudo apt purge snapd
sudo apt autoremove
NetworkManager 还需要重新配置才可以接管网卡。首先我们需要更改 /etc/NetworkManager/NetworkManager.conf 中的 managed=false 为 true 来启动 NetworkManager 的接管功能。
[main]
plugins=ifupdown,keyfile

[ifupdown]
managed=false

[device]
wifi.scan-rand-mac-address=no
然后我们需要把以太网接口列入 NetworkManager 的接管范围。修改 /usr/lib/NetworkManager/conf.d/10-globally-managed-devices.conf ,在文本最末尾添加 ,except:type:ethernet 。
我们需要设置用户文件夹,我们在安装系统的时候并没有设置用户默认文件夹,但是我们可以使用 xdg-user-dirs-update 和 xdg-user-dir 命令来创建文件夹。
现在我们需要退出 chroot 模式,按住 Ctrl+D 一直退出到 Arch 模式,然后使用 blkid 指令来查看你安装分区的 UUID ,记好你安装系统分区的 UUID ,后面写引导配置文件的时候会用到。
root@archiso ~ # blkid
/dev/mapper/ventoy: BLOCK_SIZE="2048" UUID="2024-03-01-15-06-37-00" LABEL="ARCH_202403" TYPE="iso9660" PTUUID="8cc6f18c" PTTYPE="dos"
/dev/sda2: SEC_TYPE="msdos" LABEL_FATBOOT="VTOYEFI" LABEL="VTOYEFI" UUID="3F32-27F5" BLOCK_SIZE="512" TYPE="vfat" PARTUUID="1941a3e0-02"
/dev/sda3: UUID="a1f2ebc8-33e8-4ae5-bb06-0a8565b1fa95" BLOCK_SIZE="4096" TYPE="ext4" PARTUUID="1941a3e0-03"
/dev/sda1: LABEL="Ventoy" BLOCK_SIZE="512" UUID="01C3AC6016A9B7FB" TYPE="ntfs" PARTUUID="1941a3e0-01"
/dev/loop0: BLOCK_SIZE="1048576" TYPE="squashfs"
我安装系统的分区为 sda3 ,所以查看 sda3 那一行的 UUID ,并且记下。现在开始写引导配置文件的步骤!执行 reboot 重启系统。
引导配置
进入到 Ventoy 的数据分区中,也就是你放 Arch Linux Live ISO 的分区,在根目录下创建一个 ventoy 的文件夹,在此文件夹下创建 ventoy_grub.cfg 的文件,写入以下内容来配置引导文件:
menuentry "Ubuntu" --class=custom {
    insmod all_video
        set gfxpayload=keep
        insmod gzio
        insmod btrfs
        insmod part_msdos
        insmod ext2
        insmod gettext
        set root=($vtoydev,msdos3)
    linux /boot/vmlinuz root=/dev/disk/by-uuid/<你记下来的分区 UUID > rw quiet splash
    initrd /boot/initrd.img
    boot
}
menuentry "系统恢复模式" --class=custom {
    insmod all_video
        set gfxpayload=keep
        insmod gzio
        insmod btrfs
        insmod part_msdos
        insmod ext2
    set root=($vtoydev,msdos3)
    linux /boot/vmlinuz root=/dev/disk/by-uuid/<你记下来的分区 UUID > rw recovery nomodeset dis_ucode_ldr
    initrd /boot/initrd.img
    boot
}
menuentry '<-- Return to previous menu [Esc]' --class=vtoyret VTOY_RET {
    echo 'Return ...'
}
保存好你的文件,重启回到 Ventoy 界面,按下 F6,启动你的新系统吧!